Create a tunnel (dashboard)
Follow this step-by-step guide to create your first remotely-managed tunnel using Zero Trust.
-
Log in to Zero Trust ↗ and go to Networks > Tunnels.
-
Select Create a tunnel.
-
Choose Cloudflared for the connector type and select Next.
-
Enter a name for your tunnel. We suggest choosing a name that reflects the type of resources you want to connect through this tunnel (for example,
enterprise-VPC-01). -
Select Save tunnel.
-
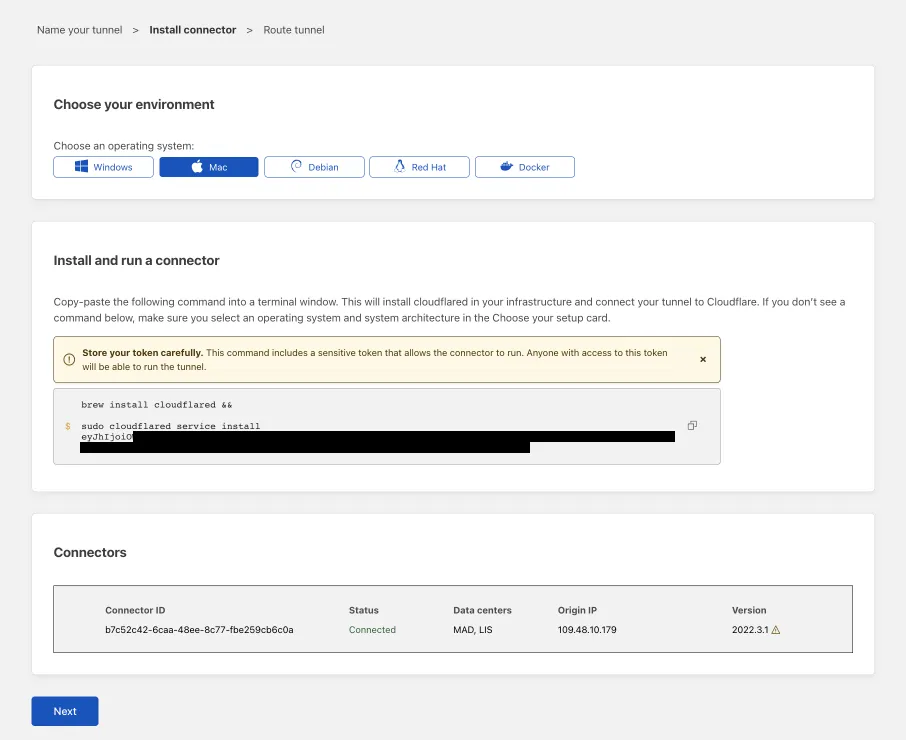
Next, you will need to install
cloudflaredand run it. To do so, check that the environment under Choose an environment reflects the operating system on your machine, then copy the command in the box below and paste it into a terminal window. Run the command. -
Once the command has finished running, your connector will appear in Zero Trust.
-
Select Next.
The next steps depend on whether you want to publish an application to the Internet or connect a private network.
Before you publish an application through your tunnel, you must:
Follow these steps to publish an application to the Internet. If you are looking to connect a private resource, skip to the Connect a network section.
-
Go to the Published application routes tab.
-
Enter a subdomain and select a Domain from the dropdown menu. Specify any subdomain or path information.
-
Specify a service, for example
https://localhost:8000. -
Under Additional application settings, specify any parameters you would like to add to your tunnel configuration.
-
Select Complete setup.
Anyone on the Internet can now access the application at the specified hostname. To allow or block specific users, create an Access application.
To connect a private network through your tunnel:
- Go to the CIDR tab.
- In CIDR, enter the private IP address or CIDR range of your service (for example,
10.0.0.1or10.0.0.0/8).
cloudflared can now route traffic to these destination IPs. To configure Zero Trust policies and connect as a user, refer to Connect an IP/CIDR.
If you would like to route to a private application using its hostname instead of its IP, refer to Connect a private hostname.
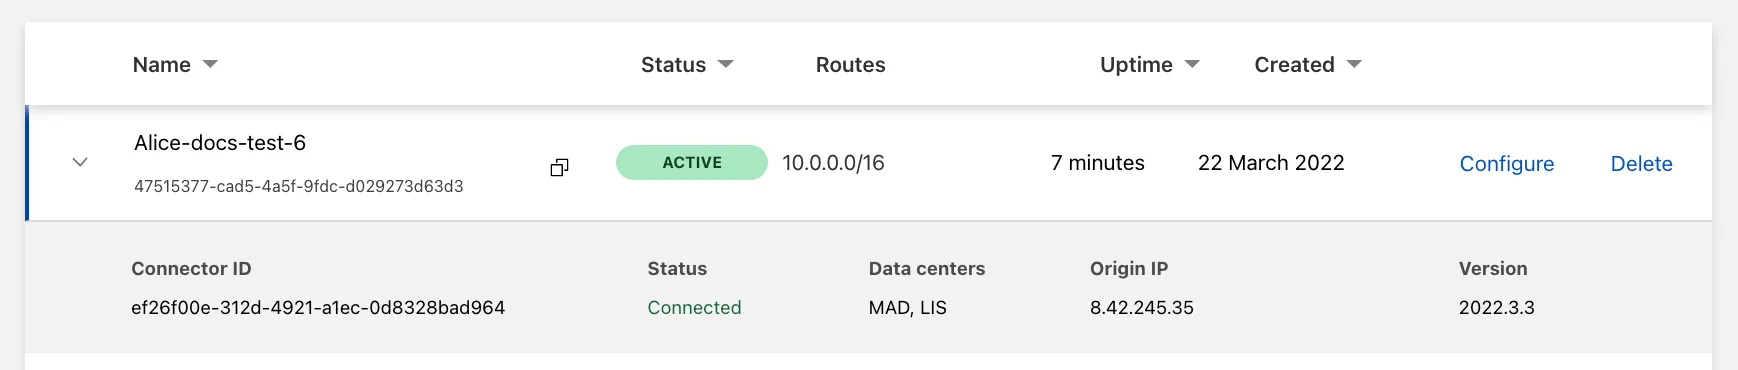
After saving the tunnel, you will be redirected to the Tunnels page. Look for your new tunnel to be listed along with its active connector.
Was this helpful?
- Resources
- API
- New to Cloudflare?
- Directory
- Sponsorships
- Open Source
- Support
- Help Center
- System Status
- Compliance
- GDPR
- Company
- cloudflare.com
- Our team
- Careers
- © 2025 Cloudflare, Inc.
- Privacy Policy
- Terms of Use
- Report Security Issues
- Trademark